For some time now, between many of my sewing projects, I’ve dreamed of making something that felt near impossible- a coat.
A big, full circle-skirted, 1950s inspired coat that would fit over my circle dresses/skirts… A dream, right?
My old favourite charity shop find (My gorgeous, black wool, double breasted Warehouse coat, complete with a big full skirt) is really starting to wear out on me, plus the sudden onset of spring here in the UK inspired me.
So, I set myself a challenge: Make a wearable Spring coat, with a big enough skirt to allow for my everyday wardrobe.
I started by hunting down the perfect pattern from my stash. Unfortunately, I don’t have much in the way of coat patterns (so far!) So I used this 1950s jacket & dress pattern to create my coat.

This pattern was a lucky find in an antiques & vintage store. It cost £4 and still has all the pieces, plus the instructions!
The pattern has a cut-in 3/4 length sleeve, a nipped in waist and a single button fastening.
I made up the jacket as per the instructions, lengthening the sleeves. I left the hem unfinished, ready for me to add my skirt. This jacket pattern was so nice and simple to sew. The only fiddly part was the 3 darts in each sleeve.
For the skirt, I decided to use the circle skirt from the dress of the pattern, plus added a few extra inches to the centre front to allow for the buttons. I love combining patterns together to create an alternative garment to the one printed on the packet, and in this instance I knew the skirt waist would be identical in size to the jacket pieces, minimising the need for any big changes to the pattern.
Once I had my skirt pieces cut and stitched, I tried on my jacket and checked where my waist sits inside it (About 6inches from the hem), marked out a clear line all the way around my jacket, and trimmed it down.
I added in some pockets to each side seam of the skirt. I have a habit of shoving my hands in my pockets as I walk, so pockets were a must. I made them a little smaller than normal, as I rarely use my pockets to actually store things.
Once my skirt was all stitched on to my jacket, I checked the fit. This pattern was a perfect fit for me, so I didn’t have to worry about any adjustments other than trimming my skirt down to an acceptable length.
I cut out a lining made from two layers of cotton, and slipped these inside my jacket. I made little cuffs to finish the sleeves nicely, rather than using a bulky hem.

I decided I didn’t like the cut in sleeve as it made my coat look a little bulky around the shoulder, and it looked too much like a dressing gown for my liking. So I cut a curved armhole then stitched the sleeves back on, creating a set-in sleeve instead. Thankfully this didn’t change the fit at all! I also changed the collar- I decided I wanted it to look a little sharper, so I adjusted that a little too by restitching the facing and trimming the edges to give it some nice sharp angles.

I hand stitched my lining into my coat, using the facings to hide the raw edges and give the inside of my coat a nice finish.

I also made up a belt to tie at the waist, and made 3 little belt loops for it to slide through.
The final stages of my coat seemed to take the longest- the hem, adding the buttons, and the buttonholes.
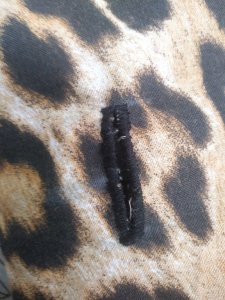
Despite sewing for years, I have a weird fear of the buttonhole setting on my machine. It never seems to obey me, and the buttonholes always seem to fray at rapid speed, so I tend to sew my buttonholes by hand. It is time consuming, but I prefer how they look and find them a little more durable than machined holes.


I only needed 4 large buttons for my coat, one where the original jacket pattern stated, and three for the skirt.
I tested out a few ways to hem my coat, but in the end I settled for some simple binding. The binding also matches the cuffs, and it stopped my hem from being too tricky. Laid out flat, my hem measures up as 8ft, so quick and simple was ideal for this project.
And here’s the final result!


I have to say, I was so pleased with how it came out- I didn’t expect it to work quite as well as what it did! I’d even go as far as saying it’s probably the project I’m most proud of!
Have you set yourself a sewing challenge? What project are you most proud of?
Happy sewing!
Eliza
Xx